Drawing has been one of the most beneficial art classes I have taken. It has taught me a lot of fundamentals that has improved my art overall. Looking back, I wish I had taken drawing before senior year. In this class I got to work with new mediums like charcoal and scratchboard. While those mediums aren't my favorite, it's good to have worked with them and I might use them in the future. The part I enjoyed most about this class was how much it pushed me. I was taught how to draw things that I would usually avoid, like glass or faces. In learning these my capabilities have opened. I also learned how to push myself composition wise, like drawing more interesting points of view. Overall I really enjoyed this class and was really glad I took it. If I wasn't a senior, I would take the class again to push myself farther and try and perfect the techniques we learned in the class.
|
1. The subject matter for this piece is one the pictures I took of two of my friends dancing. The original photo was their whole body, but I cropped it for a more interesting composition. Being in mid turn and the skirts twirling around them was a good show of movement.
2. I used texture to enhance my picture by using different textures. Like I changed the floor to wood for a more interesting texture and left the top half of the background black to make the dancers pop. The texture in the skirts showed movement within the piece, and to tell the dancer were turning, and not stationary. 3. I balanced my artwork by zooming in to focus on the movement of their skirts, so I could get more texture and movement in them. The picture also had a nice composition of one person being more in front than the other, which creates more of an interesting composition. Due to that the one up front is larger, and takes up most of the space than the person in the back. 4. I implied movement in my piece by using the movement of the lines in the skirt. My lines went in the way the skirt was flowing, or what that section of the fabric was flowing. It would have been hard to show movement if all the lines were just straight down and not with the movement. 5. I could improve my art work by adding more values and lines, which go hand in hand. My transitions could have been better, between the highlights and the darks in the piece. I could have also added more lines into the wood and made it a tighter pattern instead of a more loose one which I have. Just going in and adjusting details would make a difference. 6. I demonstrated a range of values by having parts that were completely white and parts that were left black. Using this whole range was beneficial to show all the values and not leave the piece too light or dark. Also using a lot of midtones within the skirt and transitions between the values. 1. My process for this drawing was first mapping out a standard head and eyes. Next I measured out all the other features using the shape of the eyes. Once I had all the features mapped out, I went in and through each feature drew an detailed it to fit the feature on my face. Like for example I had to make the length of my eyes a little smaller than the standard length since it was like that in the picture. After going through and shading the major features, I shaded my face and added my freckles. Lastly, I added the hair.
2. I found the different values in the portrait by mainly looking at my reference picture. I would break the face down into different sections, and focus on the shapes and shading, since it's easier for me to break it down instead of thinking of the whole piece at once. Some values I had to exaggerate in the piece, because it's harder to tell in the reference picture, like all the shading in the eyes or nose. 3. i feel like I achieved a full range of values in my piece. I used the whole range of pencils from 6H to 8B, which is good since with pencils I usually tend to shade on the lighter side. I also used a full range of values by having lights against darks, like with the nose, to show edges and highlights. 4. I feel like the work was executed neatly. I spent a lot of time on little details especially in the eyes and lips. The piece looks neat and doesn't look rushed. The only part that I could make more neat would be the hair. I could add more details in it. 5. I captured my look by getting the proportions of my eyes right. I feel like the face really revolves around the eyes, and if you mess the eyes up then the whole thing is off. That's why I made sure to put extra time into the eyes, and made sure they were my eyes, and not just a standard eye. 6. I made sure I had correct facial placement by doing the shapes of my eyes and then measuring the other features using that scale. I also used tracing paper to trace my eye on the reference picture and see what was the ratio on my face, since some things were a little different, like the sides of my face were thinner and my forehead was bigger than the standard reference. 7. Learning to draw each feature individually really helped to break everything down, so I could focus on one thing before moving to the other. Each feature in very important, so using that time to practice just that one feature really helps in the end. 8. I think every part in this unit was beneficial. I had never really learned how to properly do features of the face and the scale needed. Now that I have this knowledge, I will be more able to do faces in my future pieces and not avoid doing faces because I didn't know the proper way. This unit was a valuable asset overall. 9. The main obstacle I had to overcome was the nose. It was the most difficult for me, since there is not many harsh lines and it is all shading. I had trouble when practicing, and in the final I made sure to really spend time on it. I overcame this by breaking down the highlights and darks, and making sure they blended well together. I had made this whole blog post when I had finished the piece, but Weebly decided to delete it, so I do not have in progress pictures since I deleted them since I was done with the post. So here we go round two. 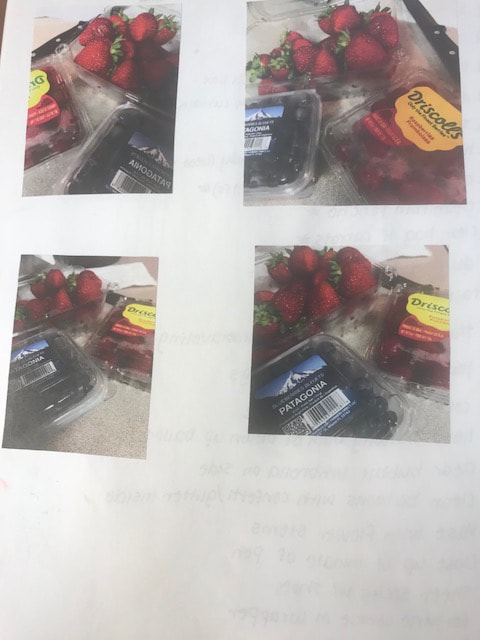 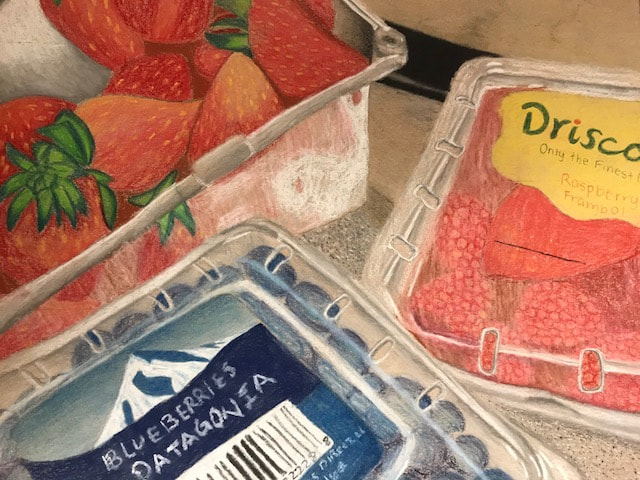 1. I think that my piece is well executed because the lines are clean and everything in the piece is well organized. The piece is neat in the fact that all the shades are blended and nothing looks rushed.
2. My choice of colors really were based of my reference picture, I didn't change any of the colors. But when I was taking the picture I made sure to have different colored fruit, like the red in the raspberries, the green in the leaves, and the blue of the blueberries. 3. I created contrast in my drawing by using different textures in the fruit and the countertop. I also created contrast by putting bright highlights against darks. Also by overlapping objects and having a foreground and background, helps creates contrast. 4. I used different textures like the pattern in the countertop, to balance out the smoothness in the plastic that the fruits are in. Plus the different textures in the fruit, like how the raspberry has little bumps and the strawberry has the seeds, really defines and help separate the fruit, so each kind is defined and it doesn't just look like random red fruit. Also adding the darks and lights in the plastic creates depth and can tell where the plastic is rounded, or where there are holes on the top where the fruit is showing more through. 5. Understanding the media is a very important aspect, by practicing with the candy project, I got a good understanding of how to work with pastel and how to draw opacity, so by the time I got to my final I was more comfortable and was able to push myself more. I would have been at a disadvantage if I had gone into this project without that knowledge. |
AuthorWrite something about yourself. No need to be fancy, just an overview. Archives
January 2018
Categories |
 RSS Feed
